Welcome to e-Typography. Typography Give You Another Unexpected View. Feel free to leave comments. Thank You.
e-Typography
Showing posts with label Tutorial. Show all posts

Tuesday, March 29, 2011

Typography Portrait in Photoshop

Link us to: http://sn.im/27quyp

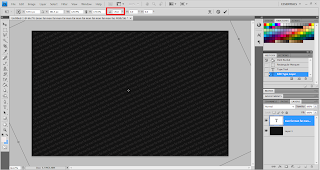
This week, I will teach you on how to create a Typography Portrait using Adobe Photoshop. After you have followed the steps shown in the tutorial that I have provided, you will definitely feel that it is simpler than what you expected.

Step 1
At first, you need to choose the picture you want to convert and drag the picture into Photoshop. Next, you need to go to Select > Color Range.
Step 2
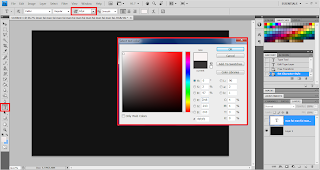
It will automatically prompt out a dialog box. Under the drop down menu, select Shadow and click ok.
Step 3
It will automatically select all the shadows in the picture. Next, you need to use shortcut key such as Ctrl + C to copy the picture shadow and Ctrl + J to paste the shadow into a new layer.
Step 4
Now, you need to go to Select > Color Range again, but this time you need to select Midtones under the drop down menu. Repeat the steps 3 such as Ctrl + C and Ctrl + J.
Step 5
Select the Midtones layer, go to Edit > Fill. It will automatically prompt out a dialog box. At the Contents drop down menu choose 50% Gray and at the Blending column tick Preserve Transparency.
Step 6
Select the Shadows layer, go to Edit > Fill. It will automatically prompt out a dialog box, at the Contents drop down menu choose Black and at the Blending column tick Preserve Transparency.
Step 7
Click on the Shadows layer and the Midtones layer, right click these two layers and select Merge Layers.
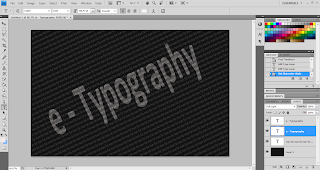
Step 8
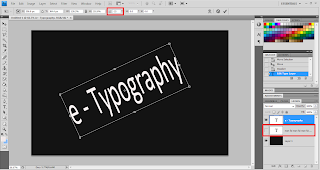
Now you need a text to fill up the image, so u need to make u new document in Photoshop and you can get a text copy from anywhere else. You need to paste the text in the new document until it fills up all the document space. Next, go to Edit > Define Brush Preset and name the new brush name. Click OK button to continue.
Step 9
You will need to create 2 layers. In order to create a new layer u need to go to Layer > New > Layer. Now choose one of the new layers and use the short cut key such as Ctrl + Backspace to make the layer fill it to the white colour and hide the layer.
Step 10
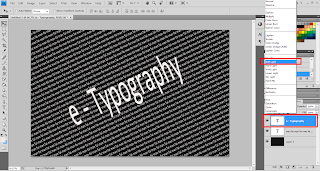
Go to the Brush icon and select the new brush text that you have created just now and adjust the Capacity to 100%. Paint the text on the second new layer that you have created.
Step 11
You need to hide the second layer before continuing. Click on the Merge layer of Shadows and Midtones, by using short cut key such as Ctrl + A and Ctrl + C to copy the entire layer. Next, you need to hide the Merge layer and unhide the second new layer and click on Add Layer Mask.
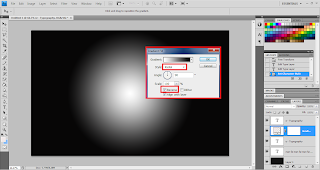
Step 12
Click on the mask that you have created and paste the merge layer picture that you have just copied. Use short cut key such as Ctrl + D to deselect and Ctrl + I to invert the picture. So you will have a negative looking at the picture.
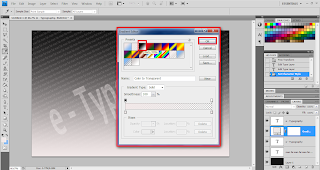
Step 13
Next, you need to unhide the first new layer and now it gives a basic outline of text graphic for you. Now, select the second new layer and click on Add a Layer Style > Gradient Overlay to apply some effect to the picture.
Step 14
It will automatically prompt out a dialog box, at the Blend Mode select Screen and at the Opacity select BlueRedYellow. Click OK Button to continue.
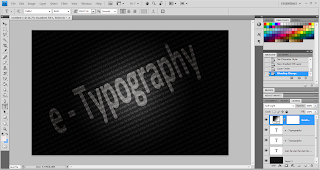
Step 15
To make the picture more attractive, go to Brush icon to select a soft brush and set the opacity to 30% to edit / paint over the second new layer (contain text).
Step 16
If you want to make a single word to overwrite and overwrite again, you need to create a new layer and at the Brush icon there chose the words and paste it where you want.

Step 17
You need to Right click on the second new layer to select Copy Layer Style and click on the new layer that u have just created in step 16 and Paste Layer Style to the layer. Finally, a beautiful design has been designed by me.


Do you think this tutorial helps you a lot while creating Typography portrait? Please share your views with us by posting your comments.

Reference:
Internet Reference
Psdtop blog, Typographic Portrait, [Online], Retrieved 28th MARCH 2011.


Tuesday, March 8, 2011

Typography Wallpaper in Photoshop


Link us to: http://sn.im/26mzow


This week, I will teach you few easy steps on how to create a Typography wallpaper using Adobe Photoshop. After you have followed the steps shown in the tutorial that I have provided, you might feel that it is simpler than what you expected.


Step 1
At first, you will need to create a background colour for the Typography you are going to create. I have set my background colour as black colour. Next you need to click on the Horizontal Type Tool and left click the left hand conner to right hand conner.


Step 2
You will then need to click on the set the text color to set the text colour. I have set my text colour to grey as the text description. Besides that, I also set the font size to 14pt so it looks comfortable not too big or too small
.


Step 3
I start to enter the text words that I want to. I just repeated the text by using copy and paste method until it fills the entire canvas.


Steps 4
Now, I go to Edit > Free Transform > Rotate. I set rotation to -25 degree angle. I need to stretch the box out using the text tool until it expands beyond the canvas size.


Step 5
Now I need to set the text Indicates layer visibility to hide. Next, I need to change set the text color to white and font size to 92.


Step 6
I can enter any world for my text. In this situation, I have entered e – Typography as my text. Next, I just repeated the same steps above (step 4), go to Edit > Free Transform > Rotate and rotate the text to -25 degree angle.

Step 7
In this step, I need to unhide the text that I have hided previously (step 5). Now go to the set the blending mode for the layer to set the e-Typography text as soft layer. Next, I need to click on the e-Typography text and right click choose the Duplicate Layer. Notice, I can drag and adjust the text to the suitable font and place I want to.

(Before)

(After)

Step 8
To make my Typography wallpaper to be more effective, I go to Layer> New Fill Layer> Gradient. Under the Gradient Editor choose black and white.

Step 9
After clicking ok button, it will prompt out a box called Gradient Fill. Set the Style to Radial and Scale to Reverse.


Step 10
Click on the Layer mask thumbnail, go to set the blending mode for the layer and choose soft layer. Finally, a beautiful design has been designed by me.

Do you think this tutorial helps you a lot while creating Typography wallpaper? Please share your views with us by posting your comments.

Reference:

Internet Reference:
Abduzeedo, Reader Tutorial: Typography Wallpaper in Photoshop, [Online], Retrieved 28th FEB 2011.


Tuesday, March 1, 2011

Tutorial - Typography Ice Cool Effect in Photoshop

Link us to:  http://sn.im/27e2t0

In today i going to teach you all how to create a easy typography art by using the Photoshop. In this tutorial i will using the Apple Macintosh Operating system and Adobe Photoshop CS5 some of the part  may little bit different from other operating system, if you has hard time to find it on another operating system you may leave the comment i will try to figure out the problem. 

After all the step has gone through you may getting the same result as the below image.
Step 1 Create a new file with 500 pixel width and 400 pixel high, with the white background.

Step 2 Use Gradient Tool in the photoshop to make a background look like the above. 
Step 3 Use Type tools to write the a world according to your wish, and set the text color to the #2bbefe
Step 4 Hold the command + Select text layer which look like above.


Step 5 go to Edit -> Copy merged, and Create a new layer, then paste in on the layer 1.
Step 6 Select the layer 1 and go to the Layer -> Layer Style -> Blending Option, set according to the image below.  


 After set up all the setting on the above, end of the result will be shown below.
On the next step, with be same as the step 4 and 5. Hold command/CTRL + Select layer text, goto Edit -> Copy merged and paste on the new layer that will be layer 2. After that change the text color to the while by using Paint Bucket Tool. As the below will be the result after the complete. 

Step 8 Add a vector mask on the Layer 2 and use pencil Tool to erase some area in Layer 2 mask, like this. 
Step 9 Right Click -> Apply Layer Mark and use Filter -> Stylize -> Diffuse on the layer 2.


Step 10 Select the Layer 2 again and goto Edit -> Transform -> Rotate 90 CW. Then, use Filter -> Stylize -> Wind, set it as Method to Wind and Direction to From the Right.


Step 11 Rotate the back the Layer 2, to rotate back by select Edit -> Transform -> Rotate 90 CCW.


Step 12 Select the layer 2 and goto the Layer -> Layer Style -> Blending Option, set according to the image below. 


Step 13 Select the Layer 2 by hold down the Command key + Select the layer text.
Step 14 Goto Edit -> Copy Merged, Create a new Layer that is Layer 3, past on it and change it from normal to the Overlay.  


Step 15 Download the below image by click on it and paste it on your Photoshop.


Step 16 select the layer 3 change it from the Normal to the Soft Light. 


Step 17 Congratulation you has create your own typography art. 


ShareThis

back to top